White Cherry Blossom Double Headband Tutorial

So we went to the coast last week and I made my daughter a daisy chain crown and that’s where I had  the inspiration for this week’s tutorial. This is so easy to make it hurts! These are really popular at the moment appearing in all the weekly magazine style pages.   You can buy them online for roughly £21 upwards, but I made this for about 50p in 30 minutes! They would be ideal for summer festivals, weddings, children’s tea parties, photography props, May Day or just wear it with a pretty summer dress.

Materials used;

Silk/artificial flowers  

Glue gun

Scissors

Florists ‘Nutscene Natural Mossing Twine’ (you can buy this from HobbyCraft for about £1.29 for 75M)

Tape measure

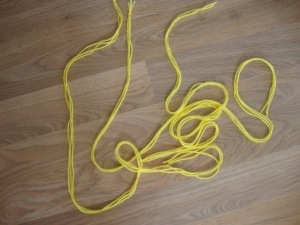
 1) Firstly, cut 6 strands of twine that are roughly 30” in length. Knot three pieces together at the top and start plaiting until you’re left with one long plait and secure with another knot. Do the same with the other strands.

2) Place one of the plaits around your head and see where it looks good and double knot it. Make the other plait slightly larger in size and knot that too. I left the plaited tails at the end my loop but it will work if you don’t want them.

3) Figure out where you want your flowers and how many of them you want. I have used 6 flowers and placed them on both bands to one side.  You can also have them evenly spaced out or even just one flower at the side.

4) Trim the plastic stem so the flower can be glued onto the band.

5) Heat up your glue gun and stick away….

6) All finished! You can also vary what I have done here too. You could make round plaited disks to stick your flowers onto or even loop the twine at the ends and attach two ribbons to act as a tie. Add a bit of faux ivy and pearls to children’s May Day crown. Anyways I hope you enjoyed this weeks tutorial.

Donate Here

Posted in Tutorials | Tagged , , , , , , , , , , , , , , , , , | 1 Comment

Mushroom Carving for Casting Tutorial

In this tutorial I will show the different stages that went into carving this little mushroom out of wax. It’s just a basic and simple base relief that I have done quickly just to show you how it works. I will try and cover other areas of carving soon, such as rings, shrinkage, clasps etc. By carving wax you can create your own pendants, earrings, bracelets, rings or even sculptures. You can make a one off piece of jewellery or multiples using just the original pattern. At the bottom of this tutorial, I have also included a PDF list of equipment, useful websites and books on the subject that are handy if you want to start carving wax.

Materials and equipment I used;

 Greaseproof paper

Masking tape

Pencil

Ferris blue wax

Good lighting

Scribe

White china marker

Tempera/poster paint

Washing up liquid

Paint brush

White spirit

Saw and

Micro motor and assorted burrs

Large wax file

Small assorted files

Tissue paper and ear buds

Wolf carving tools

Very fine sandpaper grade

Talcum powder

Fibreglass pen

 1. Draw or trace an image onto a piece of greaseproof paper. Turn the paper over and trace the lines of your original drawing.


 2. Cut a piece of wax with either a saw which is slightly larger than your image and cover the smooth upper side with white china marker. Place your image over this and secure with masking tape. Start to trace over your drawing with a scribe firmly enough for it to mark the wax underneath. Remove the paper and go over the lines in the wax again so you will have a strong image.


 3. Mix a small bit of white tempera/ poster paint with a tiny amount of washing up liquid and paint the mixture over you wax image then leave to dry for a few minutes. When dry, remove the excess paint from your wax with white spirit. You should have a crisp, clean image on your wax now.

 4. Now it’s time to cut the image out. I do this by using my frame saw first, and then using my micro motor with the largest burr attached and finally using my large wax file to file right up to the edges. If you can acquire a selection of small files, these are great for fiddly and awkward edges (I will post a full list of my files in a PDF at the bottom of this tutorial)


5. You can start removing wax from the back of your image now too. You can do this using a micro motor and burr or even filing it away with your large wax file. I opted for the micro motor as it’s the lazy way!

 6. As we are doing a base relief, it’s time we started rounding off the edges and creating depth. I start rounding off the outer edges first with my carving tools and then I used the image lines as a guild to start creating depth so it will become 3 dimensional, like in the picture. Always create the high and low points and overall shape before you start adding the details. (There is a stage during carving when you think you have ruined it or you want start all over again. But keep on going! I have felt like this with everything wax I have carved so far but I have kept on with it and in the end you will have something that you will be happy with. Constantly look at your wax, what you have done so far and your reference image if you have one. If you carve a bit too much away…you can always add more melted wax. If something snaps, you can always fuse it back together. If at any point you start getting frustrated with it, have a break and come back to it. You will see things differently after a break)


 7. Once you’re happy with your basic shape, and all the curves and different levels of the carving have been created, you can remove more of the excess wax from the back of the carving using either burrs or scraping it out with carving tools.  By removing excess wax from the back, you will use less metal when it gets cast making it lighter and keeping costs down. Hold the wax up to the light to gauge where to hollow it out. The light blue bits will be thin whereas the darker blue bits will be thicker. Smooth the rough lines as much as possible for evenness.


8. We need to now smooth the surface of the wax. You can do this in a number of ways. I start by lightly brushing a fibreglass eraser over the surface to get rid of scratches and lines. Then I use a very light grade sandpaper. Lastly, I go over my wax with white spirit. Don’t rub to much though as it wears away the wax.

9. At this point, when your surface is nice and shiny and the back of the base relief has been hollowed, start adding the details. I used a hot wax worker to melt dots of wax shavings on to the top of the mushroom. I added a small amount of detail to the top of the stem and under the mushroom’s cap too. I then slightly filed over the cap again (when wax has been melted and cooled it becomes a lot harder so you will have to file it a bit more forcefully than normal) Add talc with a fine brush and use magnification to see the details properly.

10. Once you have finished all your details and you are happy overall with the shape give it another smooth over with the fibreglass pen and make sure there is no paint, china marker or talc left. Add a circle of spool wax to the top of the cap by using the hot wax worker if you want to make it into a pendant. (note, I applied talc to show detail in the picture)

11. You should now have a wax pattern ready for casting.

Basic list of tools wax carving beginners

Donate Here

Posted in Tutorials | Tagged , , , , , , , , , , , , , | Leave a comment

Wax carving to make jewellery…

really should be in bed now but I just wanted to let you know what I have planned for this week’s tutorial. Wax carving/patterns are used in a process called ‘lost wax casting’ and it’s how a lot of jewellery is made. This is because many multiples can be made from one original wax pattern so it saves on time and money. Wax is very versatile and can be a great medium to work with. So if you think this might tickle your pickle, stay tuned  and make sure you pop in over the weekend as hopefully it will be up and running by then 🙂

Here are a few pics of bits and bobs I have done in the past…


Posted in Uncategorized | 2 Comments

Appliquéd Picnic Blanket/Sofa Throw

Summer is now fast approaching and with all that lovely sunshine comes picnics! Hurrah!

If you don’t fancy getting grass stains on your summer dresses and want to park your bum on something great then this might be for you 😉 This week, I’ll be telling you how I made this simple appliquéd blanket especially for the forthcoming summer antics. This was really cheap for me to make and cost me roughly £2 all in all.


Materials and equipment used;

 Sewing machine or sewing needle

Cotton thread

Scissors (fabric shears, thread snips and paper scissors)

Printer and paper

Large fleece-like throw/blanket 140x200cm

Scrap fabrics

Very fine black marker

Dressmaker’s pins

Decorations (felt, sequins, buttons, beads, ribbon)

1. These blankets are a great way to make use of all those pieces of scrap fabric, felts and even old clothes so have a rustle around and see what you’ve got. Get a rough idea of what you want to do (lettering, appliqué birds, trees, flowers etc) and what materials you’re going to use. Make a rough sketch of your ideas.
2. If you want to use wording on your blanket then a great place to start looking for fonts is a website called dafont.com. It’s best to opt for something that isn’t to intricate. I chose a font called ‘Striped Caps’ which looked beautiful and would be fairly easy to stitch onto the throw. You can download, save and unzip these files directly onto your desktop and drag and drop the unzipped font package into the ‘font folder’ which is located in your control panel.

3. Once you have done this, double check to see if the font is there in Microsoft Word by scrolling through the fonts bar. In the ‘font size’ tab, it only gives the maximum size of a font as 72. To change this, type in a number between 400-700 (these sizes will give you a letter that will fill an A4 sheet) and press enter. Type whatever you need in a print off as a fast draft (this option saves on ink!) You can also search and print silhouettes or images of birds, cupcakes, tree branches or anything else you want to incorporate into the blanket.


4. When all my font templates were printed, I cut them all out. One at a time, I reversed a letter onto the back of the fabric and drew around it with a fine black pen. When all my letters were outlined I carefully cut them out with fabric shears.


5. I arranged all my letters onto my blanket and secured them with dressmaker’s pins.

6. If you are sewing by hand, you can use a blanket stitch around each appliqué. I used my sewing machine and used a medium zig-zag stitch, slowly manoeuvring around corners and curves. Reverse stitch to secure the stitches at the beginning and the end.

7. When everything has finally been attached, trim all the end threads and frayed letter edges with thread snips. Wrap some cellotape around your hand to pick up all the bits, fluff and cotton from front and back.

And there you are….you have an awesome and unique picnic blanket!!!

Donate Here

Posted in Tutorials | Tagged , , , , , , , , | Leave a comment

Papier Mache Marionette (Stringed Puppet) Tutorial

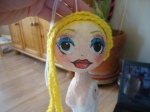
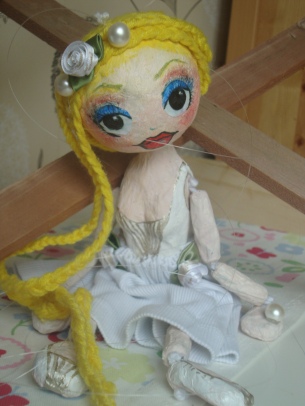
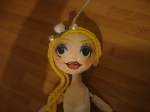
A completed paper mache marionette with strings

Make a beautiful peasant girl, an Arabic belly dancer, a handsome prince or an evil witch….maybe even all of them if you have the time! As far as I know, there isn’t another tutorial like this on the web at the moment. I searched high and low as I wanted to make a marionette for my daughter at Christmas. This is the end result. Don’t be put off by the long list of materials too. Most of them you will probably lying around the house anyway. X

Materials used;

Newspaper

Plain Flour

Fork

PVA glue

Matt modge podge*

Bowl

Tin foil

Plastercine or blue tac

Coloured wool for hair

White/beige wool for stringing body together

A4 white paper

Pencil

Compass

Small thinnish screwdriver

Transparent nylon string

Scrap of fabric fabrics

Acrylic or gouache paints

Coloured chalk*

Rounded wax file*

Scalpel

Sandpaper (fine-medium grade)

Glue gun

Small soft play ball (like in the pack of 100 you can buy)

Needle and cotton thread

Ribbons/buttons/appliqués for decoration*

Small twisted piece of wire

Four pennies

Paint brushes

Fine black marker

Thin 60″ plank of wood

Saw

Hammer

No nails bonding glue….

and two nails  : )

Pins

*optional

1. The first thing we need to do is construct the marionettes body parts…which are the head, the torso, the 4 arm pieces, 4 leg pieces, hands and feet. The head is modelled around the plastic ball, and the structure of the body consists of tin foil, plastercine and coins.

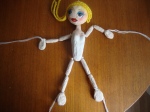
2. Start modelling the torso from the foil. We are aiming for a shape like in the picture below. Start with the neck which needs to be fairly long as half of it will not be on show when attached to the head. Make sure the foil is compressed tightly so it is sturdy. Create the rest of the torso around the neck. Slightly bend the body so the back has a slight arch. Roll two plastercine balls to make the chest (As big or as small as you like!) Make a hole through the side of the neck, just below the shoulders and at the bottom of the body.
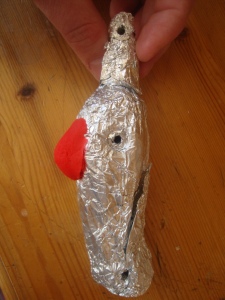
Step 1 – Making the paper mache marionette torso
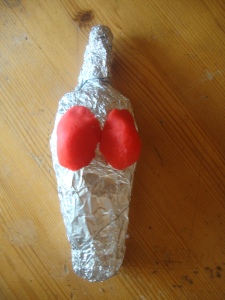
Step 2 – Making the paper mache marionette torso

3. To make the limbs, simply work your tin foil around a screwdriver compressing it down, building it up and compressing tightly again. Two of the arm and leg pieces need to be longer and slightly larger than the others to make the body look in proportion.
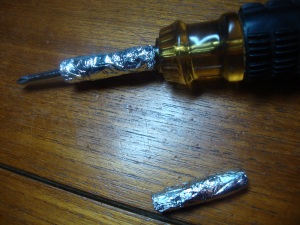
Step 3 – Making the paper mache marionette limbs
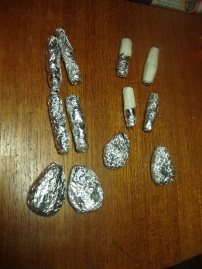
Step 4 – Making the paper mache marionette limbs

4. The hands and feet are made of the tin foil wrapped around the pennies (the penny is needed for weight) with space to make a hole to attach to the arms and legs).

5. When all these pieces have been made, we need to cover them with papier mache. Mix the flour and water into a runny paste and tear strips of paper. I always start with the puppet head first as this will take longest to dry. We need quite a few layers and it needs to be just under a centimetre in thickness. Smooth any wrinkles out with you fingers. Place it in an eggcup and leave next to the radiator overnight. Cover all other body parts in the same way. Don’t  worry about covering the holes…these can be ‘poked’ through when dry
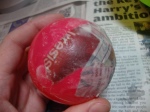
Step 5 – Making the paper mache marionette head
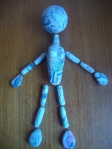
Step 5a – Making the paper mache marionette body

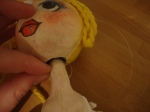
6. When everything is completely dry, we need to open up the head with a saw or scalpel (sounds harsh doesn’t it!) Start cutting a straight line right the way around. Make a mark across the cut before you pull the head apart so you know where the pieces should be when gluing back together. When separated, prize and discard the ball. Either with a scalpel or file make a hole for the neck like in the picture below. There needs to be enough room for the head to move around the neck. We also need a smaller hole at the top of the head for the neck string to be threaded. Glue back together with PVA or use a glue gun.
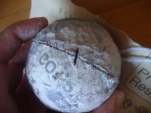
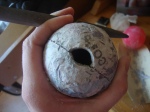
            

7. Open up all other holes that were covered when papier mache’d, not forgetting the torso. Using your screwdriver to make holes at the top of the hands and feet too.
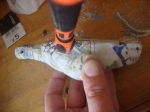
Step 7 – Making the paper mache marionette torso

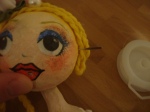
8. Next we need to paint the puppet and add all the details. For the facial features, I drew the eyes and mouth on white paper, cut them out and stuck them directly onto my puppets face with PVA then added colour and sealed with modge podge. The eyes were drawn using a compass with a diameter roughly the size of a penny with a smaller pupil and eyelids. Draw a nose and eyebrows on too. Paint all the limbs and torso a flesh colour. You can also paint the back of the head a colour to match the hair, the corset and shoes (which I had forgotten about until later..doh)
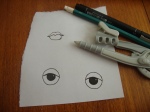
Step 8 – Paper mache marionette facial features
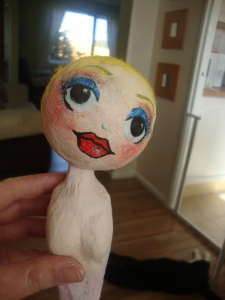
Step 8a – Paper mache marionette facial features
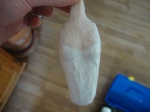
Step 8 – Paper mache marionette facial features

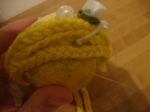
9. Now we need to create the hair for our puppet. There are loads of different styles you can play around with using the wool. Visit my flickr account to see more. Use a glue gun to attach the hair. I used 18 strands to make two long plait in total. Make sure you leave access to the hole at the top of the head.
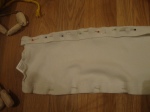
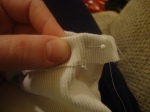
10. Next I made the skirt. Get a piece of scrap fabric and pucker up around the base of the torso to determine how much fabric you will need. Cut out the desired length. Make hems at both the top and the bottom of the fabric. Feed a string of wool through one hem and pucker the skirt. Sew back together. Glue the finished skirt to the bottom of the puppets torso with a glue gun. Alternatively, I have just cut out an old vest, sewn a rough hem and pulled the thread to pucker it and attached with the glue gun.
                        

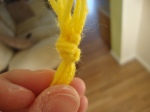
11. With all our bits and bobs done it’s time to attach all the body parts together. Wrap a long piece of doubled over wool, around a small twisted piece of wire and feed it through the neck. Tie a knot at the top of the neck. Feed the thread through the hole you made earlier at the top of the head. Gauge where the head will sit on the neck and make a mark on the wool at the top of the head like in the picture below. Remove the thread from the head and tie a triple knot just under the mark you made. Feed the thread through the head once more and see if it looks like its sitting right. If so, make a triple knot at the top, so it’s secure. Pull the thread taut and use a dot of glue from the gun to secure it even more. Trim the excess wool off.
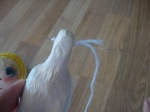
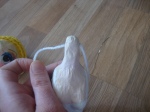


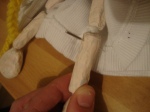
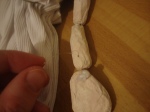
12. Repeat the same process for the shoulders and bottom of torso, triple knotting the wool to secure at each entrance like in the picture below. Add the thighs and tie a knot at the knee, making sure that the joints can be easily bent. Add the lower leg and triple knot and finally finish with the foot. Trim the excess strand off under the foot. Do the same for arms.
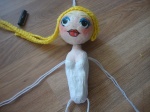
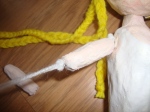
                                              

13. You can add your decorations and finishing touches to you puppet at this stage if you like or you can leave till later.
14. Now our puppet is completely finished and the body is attached, it’s time to string it. There will be 7 strings in total. These will be 2 at the side of the head and one at the back. The other four will be at the wrists and bottom of the knees like below. Get a sturdy needle and in the centre of the knee make a hole straight through. Thread your nylon string through and knot it so it’s secure. Don’t forget to feed the string through the fabric skirt too. Repeat this step for the other limbs, hands and feet. Do the same for the three points of the head. Keep threading your nylon through and eventually you will be able to tweeze it out of the gap between the head and neck. Secure with knots.


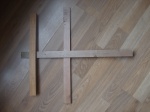
15. When you have strung it completely, we need to make the control bar. I grabbed a thin scrap wood plank from my garden that was roughly 60” in length which I cut with a hand saw. The main control bar is 22” and the top bar across is 16” and the second bar, 19”. I glued the top bar with ‘no nails OVER the control and the second bar UNDER the main control, making sure all lengths were equal. Then I hammered two small nails through the centre to secure it.
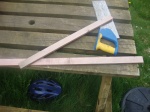
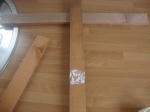
                                    

16. This is a rough guild on were to tack your nylons to the controls. Tack them with pins by wrapping the nylons around a few times and pressing to secure. Will try to explain this as clearly as I can but cant promise anything 😉 ….
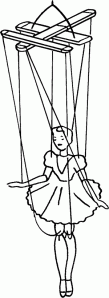
Both wrist nylons are tacked to the front main control bar on top.

The legs nylons are tacked to the first across bar underneath…on either side.

The side of the head nylons are tacked to the second across bar underneath…either side.

The back of the head nylon is tacked beyond on the main control behind the second across bar, as in the photo below.
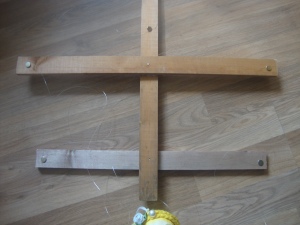
17. I have left the pins on my marionette because I haven’t got much time, but you could always hammer nails points to wrap the nylon string too. Another method is using a very thin drill bit, making points and thread the strings though and knot them, but its whatever suits you really.

So there we go!!!! We are finally finished! Hope you like them x

Donate Here

Posted in Tutorials, Uncategorized | Tagged , , , , , , , , , | 6 Comments

Paper Butterflies

Make these colourful and delicate butterflies to liven up your potted plants, a vase of flowers or stick them on a plain picture frame!

Materials needed;

White tissue paper
Flour
Bowl
Fork
Plastic plate
Silver plated wire, diameter 0.4mm
White cotton
Pliers
Selection of paint brushes
Watercolours
Scissors/scalpel
Greaseproof paper
Pencil
Masking tape
Small pritt stick foam pad or….
A wooden stick, small spring and glue gun
Old mustard jar
Modge Podge
Butterfly images

1. Select which butterfly you want to make by having a look around the net. This is a great site http://www.britishbutterflies.co.uk/ Try and pick an image which has a flat bird’s eye view of your as it will be easier when we start to draw it later on.

2. Next, mix the flour and luke warm water together in a bowl.

3. Now tear up pieces of the tissue paper and with a paint brush, spread some of the mixture onto your plastic plate and start layering your tissue on top of each other, flattening wrinkles with your brush. You can hold the plate up to a light to see the overall thickness. It should be a couple of layers thick at least. Leave to completely dry.

4. Whilst waiting for your paper to dry we can make the body. Cut some wire with your pliers roughly twice the length of the butterfly’s body in your reference picture. Double over and twist the wire with your pliers, making a little loop at both ends. Triple knot cotton thread into one of the loop and start wrapping it around the wire until you have a shape that resembles a body. Fasten and dip the entire body into the flour/water mixture and leave to dry.

5. Now we can start to draw our outline image to transfer onto the paper. As butterflies are symmetrical, tracing would give better results than freehand drawing. So to do this, take a small square of greaseproof paper trace the butterfly you have chosen. A light box is really handy for this but a glass lamp would also work well. When you have drawn all the details, turn the greaseproof paper over and go over the lines.

6. When your paper I completely dry, peel it off the plate. Secure the greaseproof paper with small bits of masking tape onto the paper and go over all the lines once more. Remove the greaseproof paper and you should have a faint image of your butterfly. Go over the outline again if needed.

7. Start to cut your butterfly out, either by using scissors or a scalpel, depending on the wings edges.

8. In my tutorial pictures, you can see that I started painting the butterfly when I hadn’t attached the body. This is because I was watching the 6 nations at the time and had a temporary lapse in concentration!
Before you start painting you can secure the body with Modge Podge and dab the flour mixture between the body and wings. Leave it to dry for a couple of minutes.

9. Start painting! I paint the main base colour first, then add the other little blocks of colour and then move onto the detail. Try not to over clog your brush with excess water as it will curl the paper edges. If the edges do curl though, it can be fixed with dabbing on glue and pressing it down for a couple of seconds

10. When you have decided that everything looks good and your happy with the butterfly you can either seal it with Modge Podge or leave it as it is, depending on what you want to do with it. If it will be going anywhere near water, like a vase of flowers, then sealing it would be a good idea.

11. If you want your butterfly to liven up a plain picture frame, just get a small sticky foam pad or even blue tac and…well….stick it on.
If you want it on a stick for a plant pot, just attach the spring to the stick, making sure its secure and glue the butterfly onto the spring using a glue gun. And there you go….your all done!

Donate here

Posted in Tutorials | Tagged , , , , | Leave a comment

Realistic garden bird’s tutorial

Make your own gorgeous, realistic little birdies. They look great on bits of driftwood, on top of toppled books and standing on plant pots! Make them for yourself, for a wedding centrepiece, or as a beautiful gift for someone special.

Materials used –

Newspaper

Thin roll of masking tape

Plain kitchen roll

PVA or modge podge

Plain Flour*

Card (old cereal box)

A pack of 3mm or 4mm Black round glass beads (size of bead depending on size of bird)

Silver plated wire, diameter 0.4mm

Paints (acrylics or gouache are perfect but you could also use water colours)

White cotton thread

Thick sewing machine needle or something thick and pointy! (It will go blunt after a while though….sorry mam!)

Bowl

Fork

Assorted Paint brushes

Old mustard jar

Metal nail file*

Pliers

scissors

Images of the bird you want to make (Ie blue tit, finches etc)

*optional

1. Firstly, gather images of the bird you want to make and keep them to hand as a reference for when you are shaping the body and painting the details.

2. Mix up a small bowl of PVA, water and a tablespoon of flour. Whisk any lumps out with a fork. The consistency you are looking for is runnier than double cream….but thicker than single cream.

3. Tear a piece of newspaper and make an egg shape like in the picture above, and secure with small strips of masking tape. Next make a smaller oval shape, and secure it to the body with making tape. This is you rough bird body.

4. To make the beak, tear a couple of strips of masking tape. Stick it onto the head of the bird and manipulate it into a beak shape by pinching and twisting it. You will need about 4 to 5 small strips to make it fairly sturdy.

5. Now it’s time to cover the body in kitchen roll. Tear off little strips and dip them into your PVA/flour mixture and cover the whole body. Try not to thoroughly drench the kitchen roll. Smooth around the body with your finger tip. Pay attention to around the head and beak and make sure the papier mache isn’t to thick around this area.

6. Leave to dry on a radiator or airing cupboard until completely dry (normally takes a couple of hours) cover your remaining mixture with a plate to use for later.

7. Now your body has dried, its time to add a bit of shape to the head and beak. Where the eyes of the bird are going to be, press your thumbs gently into it, to make it look as if its the natural contours of the birds face. Then with your thumb nail, define around the beak pressing into it lightly. You can also use a metal nail file to give the beak a bit more shape (although only do this a little)

8.  Now it’s time to concentrate on the wings and tail. Draw a wing shape onto your cereal box card. Cut it out and trace around it to have another identical wing. Draw the tail (if your bird needs one) and cover them with the PVA/flour mixture and kitchen roll. These parts only need to be 2 strips thick each side really otherwise they look to bulky.

9. Start by attaching the tail (if required) to the bottom of the bird. Tear strips of kitchen roll and place across the stump of the tail, as in the picture below. Also do the same for underneath. Apply the wings in the same fashion, by holding the wings in place onto the body with strips. Leave to dry for a couple of hours

10. Now your body is completely dry it’s time to fix the eyes. Get your needle and make two holes either side of the face. Bird’s eyes usually face outwards rather than forwards. Make the hole slightly smaller than your bead. Add a small bit of PVA and press the eyes securely into place. It will take a couple of minutes to dry.

11. Now the fun part…painting! Using your images as a reference, choose the colours you are going to need. I always paint the beak first then the head moving up that way. It would probably be easier though, creating a base colour and adding the details and highlights gradually. Try to create and pick up all the detail in the face and wings as these stand out the most. Dont forget all the crevasses under the wings and tail too. Once you are pretty happy with your painted bird you can either leave it as it is or cover with a seal like matt modge podge or even PVA.

12. Last but not least we have to make the legs. Using your wire and pliers, cut two pieces of wite about …. each.  Manipulate the foot using your pliers and twist each toe for strength. At the other end of the leg, make a little hook. Using your cotton sewing thread, make a not around the hook. Twist the tread all around the leg and down to the foot, like in the picture below. There shouldn’t be much wire visible. Move your thread from the toes back up to the hook and make a not. Once you have done this, paint them (sometimes the thread can unravel on the toes but if this happens, when you paint them just twist the thread back around the toe and the paint should stick it back into place)

13) When your little birdy legs are dry, with your thick sewing needle make two holes into your birds underbelly. The feet should be more towards the head and the base nearer the bird’s bottom. The wire can be moved into any position. When you’re happy the legs look in the right place, add a bit of modge podge or PVA to secure them.

14) Yay…you’re done!!! Hope you enjoy making these.

(You can also make flying birds like swallows or hummingbirds…visit my flickr to see more paper birds. Just use wire for the beak of the hummingbird and secure with masking tape. When finished, make a small hole through the entire body and thread your cotton through, making a knot under the belly. With some plain card cut out a rectangle,, wrap the thread through and adjust the length of the cotton. Attach it to your ceiling with blue tac and hey presto…you have a flying bird!)

Donate Here


Posted in Tutorials | Tagged , , , , | 4 Comments

Hello!!

Hello Everyone! (Well just me at the moment…that’s a bit sad actually!) Hehe

I’m very excited about my very first post on the ‘How I Made It’ Project though. My love of all things creative and my desperate need for a deposit on a house is why I have started H.I.M.I.P. If you want to know more about this, have a quick peak in the ‘About’ section.

I have loads of tutorials which i will be posting very soon, with the aim of at least one a week. Upcoming tutorials include;

Paper projects (realistic birds and butterflies, marionette puppets, decorative bowls)

Sewing and needle work (contemporary cross stitch, appliquéd throw, printed pillows)

Soldering glass (Victorian terrarium, lanterns)

Wax carving (how to carve wax for ‘lost wax casting’ jewellery)

…AND LOADS MORE…so make sure you come back…mmmkay!

I will also be posting things that are beautiful, inspirational and interesting which I have found from other artists dotted all around the web.

So I hope I’ve done enough to tempted you to come back!

And on that note I hope you see you around again soon,

Kate x

Posted in Uncategorized | Leave a comment