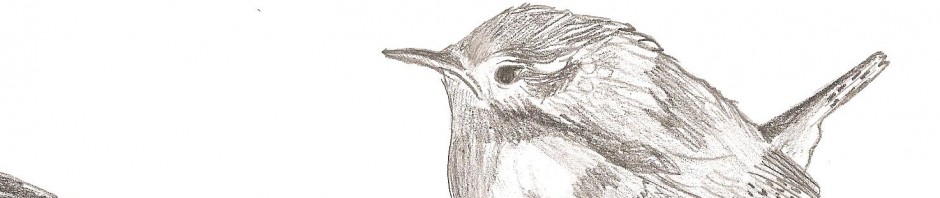

A completed paper mache marionette with strings
Make a beautiful peasant girl, an Arabic belly dancer, a handsome prince or an evil witch….maybe even all of them if you have the time! As far as I know, there isn’t another tutorial like this on the web at the moment. I searched high and low as I wanted to make a marionette for my daughter at Christmas. This is the end result. Don’t be put off by the long list of materials too. Most of them you will probably lying around the house anyway. X
Materials used;
Newspaper
Plain Flour
Fork
PVA glue
Matt modge podge*
Bowl
Tin foil
Plastercine or blue tac
Coloured wool for hair
White/beige wool for stringing body together
A4 white paper
Pencil
Compass
Small thinnish screwdriver
Transparent nylon string
Scrap of fabric fabrics
Acrylic or gouache paints
Coloured chalk*
Rounded wax file*
Scalpel
Sandpaper (fine-medium grade)
Glue gun
Small soft play ball (like in the pack of 100 you can buy)
Needle and cotton thread
Ribbons/buttons/appliqués for decoration*
Small twisted piece of wire
Four pennies
Paint brushes
Fine black marker
Thin 60″ plank of wood
Saw
Hammer
No nails bonding glue….
and two nails : )
Pins
*optional
1. The first thing we need to do is construct the marionettes body parts…which are the head, the torso, the 4 arm pieces, 4 leg pieces, hands and feet. The head is modelled around the plastic ball, and the structure of the body consists of tin foil, plastercine and coins.
2. Start modelling the torso from the foil. We are aiming for a shape like in the picture below. Start with the neck which needs to be fairly long as half of it will not be on show when attached to the head. Make sure the foil is compressed tightly so it is sturdy. Create the rest of the torso around the neck. Slightly bend the body so the back has a slight arch. Roll two plastercine balls to make the chest (As big or as small as you like!) Make a hole through the side of the neck, just below the shoulders and at the bottom of the body.

Step 1 – Making the paper mache marionette torso

Step 2 – Making the paper mache marionette torso
3. To make the limbs, simply work your tin foil around a screwdriver compressing it down, building it up and compressing tightly again. Two of the arm and leg pieces need to be longer and slightly larger than the others to make the body look in proportion.

Step 3 – Making the paper mache marionette limbs

Step 4 – Making the paper mache marionette limbs
4. The hands and feet are made of the tin foil wrapped around the pennies (the penny is needed for weight) with space to make a hole to attach to the arms and legs).
5. When all these pieces have been made, we need to cover them with papier mache. Mix the flour and water into a runny paste and tear strips of paper. I always start with the puppet head first as this will take longest to dry. We need quite a few layers and it needs to be just under a centimetre in thickness. Smooth any wrinkles out with you fingers. Place it in an eggcup and leave next to the radiator overnight. Cover all other body parts in the same way. Don’t worry about covering the holes…these can be ‘poked’ through when dry

Step 5 – Making the paper mache marionette head

Step 5a – Making the paper mache marionette body
6. When everything is completely dry, we need to open up the head with a saw or scalpel (sounds harsh doesn’t it!) Start cutting a straight line right the way around. Make a mark across the cut before you pull the head apart so you know where the pieces should be when gluing back together. When separated, prize and discard the ball. Either with a scalpel or file make a hole for the neck like in the picture below. There needs to be enough room for the head to move around the neck. We also need a smaller hole at the top of the head for the neck string to be threaded. Glue back together with PVA or use a glue gun.


7. Open up all other holes that were covered when papier mache’d, not forgetting the torso. Using your screwdriver to make holes at the top of the hands and feet too.

Step 7 – Making the paper mache marionette torso
8. Next we need to paint the puppet and add all the details. For the facial features, I drew the eyes and mouth on white paper, cut them out and stuck them directly onto my puppets face with PVA then added colour and sealed with modge podge. The eyes were drawn using a compass with a diameter roughly the size of a penny with a smaller pupil and eyelids. Draw a nose and eyebrows on too. Paint all the limbs and torso a flesh colour. You can also paint the back of the head a colour to match the hair, the corset and shoes (which I had forgotten about until later..doh)

Step 8 – Paper mache marionette facial features

Step 8a – Paper mache marionette facial features

Step 8 – Paper mache marionette facial features
9. Now we need to create the hair for our puppet. There are loads of different styles you can play around with using the wool. Visit my flickr account to see more. Use a glue gun to attach the hair. I used 18 strands to make two long plait in total. Make sure you leave access to the hole at the top of the head.


10. Next I made the skirt. Get a piece of scrap fabric and pucker up around the base of the torso to determine how much fabric you will need. Cut out the desired length. Make hems at both the top and the bottom of the fabric. Feed a string of wool through one hem and pucker the skirt. Sew back together. Glue the finished skirt to the bottom of the puppets torso with a glue gun. Alternatively, I have just cut out an old vest, sewn a rough hem and pulled the thread to pucker it and attached with the glue gun.


11. With all our bits and bobs done it’s time to attach all the body parts together. Wrap a long piece of doubled over wool, around a small twisted piece of wire and feed it through the neck. Tie a knot at the top of the neck. Feed the thread through the hole you made earlier at the top of the head. Gauge where the head will sit on the neck and make a mark on the wool at the top of the head like in the picture below. Remove the thread from the head and tie a triple knot just under the mark you made. Feed the thread through the head once more and see if it looks like its sitting right. If so, make a triple knot at the top, so it’s secure. Pull the thread taut and use a dot of glue from the gun to secure it even more. Trim the excess wool off.


12. Repeat the same process for the shoulders and bottom of torso, triple knotting the wool to secure at each entrance like in the picture below. Add the thighs and tie a knot at the knee, making sure that the joints can be easily bent. Add the lower leg and triple knot and finally finish with the foot. Trim the excess strand off under the foot. Do the same for arms.


13. You can add your decorations and finishing touches to you puppet at this stage if you like or you can leave till later.

14. Now our puppet is completely finished and the body is attached, it’s time to string it. There will be 7 strings in total. These will be 2 at the side of the head and one at the back. The other four will be at the wrists and bottom of the knees like below. Get a sturdy needle and in the centre of the knee make a hole straight through. Thread your nylon string through and knot it so it’s secure. Don’t forget to feed the string through the fabric skirt too. Repeat this step for the other limbs, hands and feet. Do the same for the three points of the head. Keep threading your nylon through and eventually you will be able to tweeze it out of the gap between the head and neck. Secure with knots.


15. When you have strung it completely, we need to make the control bar. I grabbed a thin scrap wood plank from my garden that was roughly 60” in length which I cut with a hand saw. The main control bar is 22” and the top bar across is 16” and the second bar, 19”. I glued the top bar with ‘no nails OVER the control and the second bar UNDER the main control, making sure all lengths were equal. Then I hammered two small nails through the centre to secure it.


16. This is a rough guild on were to tack your nylons to the controls. Tack them with pins by wrapping the nylons around a few times and pressing to secure. Will try to explain this  as clearly as I can but cant promise anything 😉 ….
Both wrist nylons are tacked to the front main control bar on top.
The legs nylons are tacked to the first across bar underneath…on either side.
The side of the head nylons are tacked to the second across bar underneath…either side.
The back of the head nylon is tacked beyond on the main control behind the second across bar, as in the photo below.

17. I have left the pins on my marionette because I haven’t got much time, but you could always hammer nails points to wrap the nylon string too. Another method is using a very thin drill bit, making points and thread the strings though and knot them, but its whatever suits you really.
So there we go!!!! We are finally finished! Hope you like them x


Another wonderful tutorial… Thank you.
Thank you so much….so helpful. I have my supplies ready and I am prepared to make twelve puppets…wish me luck!
No worries 🙂 Good luck Jeri!
Thanks for the tutorial!! It was such a lifesaver. For my IB Visual Arts class I have decided to construct a marionette puppet as part of my next piece. I had difficult with the construction of the marionette. At first I began with just balling up newspaper and using that as an armature, while adding strips of papier mache on top. It didn’t work as well as I thought it would — I found myself constantly frustrated with the paper sticking to my fingers and it coming off of the newspaper armature. Your tutorial really gave me hope! Thanks again!!
what colours did you use for the skin
JUST USE PEACH COLOUR OR BABY ORANGE COLOUR OR BABY PINK